
walllet.com verification may require personal details, an accepted identity method, clear document images, a selfie and, in some cases, address or source-of-funds information. Exact requirements depend on the service, country, eligibility and regulated provider. “Under Review” means no final decision has been issued yet; it does not confirm approval or rejection.
A verification screen can ask for an ID, selfie or address information without explaining which details matter most. Then a submission fails, moves to “Under Review” or stops offering a retry.
The first distinction is important: creating or using a core wallet and applying for a regulated payment account or card do not necessarily involve the same verification process. Identity checks for payment accounts, cards and fiat services may be performed by regulated partners. Those providers can determine document requirements, eligibility and compliance decisions independently.

If you are applying for the card, start with the current walllet.com virtual dollar card guide. If you are still deciding what kind of receiving account fits your work, compare a domiciliary account with a virtual dollar account before completing onboarding.
What walllet.com verification may cover
Depending on the feature and verification route, you may be asked to confirm:
your legal name and date of birth;
your country of residence;
your phone number or email address;
your residential address;
an available identity method;
images of an accepted identity document;
a selfie or live face capture;
proof of address;
your occupation or expected account use;
source-of-funds information.
For eligible Nigerian card applicants, the current route may offer methods involving a BVN, NIN, Nigerian driver’s licence or international passport. This is not a permanent list of documents accepted for every walllet.com service. The options displayed inside your account are the current instructions for your route.
A successful identity check does not automatically guarantee payment-account access, card issuance or transaction approval. Product availability, country support, account eligibility, compliance checks and card-programme rules can still apply.
Which requirements are provider-specific?
Almost every operational part of KYC can vary by provider or route.
Requirement | What may vary | What the user should follow |
Accepted ID | Passport, national identity method, driver’s licence or another government document | Only the options displayed in the current verification flow |
Document format | Physical document, live camera capture or an allowed upload | Use the capture method requested on screen |
Front and back | Some cards require both sides; passports may require a specific page | Submit every side or page the flow requests |
Selfie check | Still selfie, video, head movement or another liveness step | Complete the exact on-screen action |
Proof of address | Document type, issue date, name and address format | Follow the document and date rules shown in the app |
Source of funds | Whether it is required and which evidence is accepted | Provide only the evidence specifically requested |
Resubmission | Immediate retry, a new link, manual review or no self-service retry | Use the available in-product option or official support |
Review time | Automated checks, manual checks and additional information can take different amounts of time | Rely on the status and notices shown for your application |
Do not use a general online KYC checklist as proof that a particular document must be accepted. Even verification vendors state that the business using the verification flow decides what it requires. Persona’s identity troubleshooting guidance makes this distinction explicit.
Before you start: the document checklist
Prepare the submission before opening the camera.
Use the same legal identity throughout the process.
Your name, date of birth, country and other identity details should match the document and the information already attached to your account.Check the country first.
Do not continue if the country selected during onboarding differs from your residence or the country attached to the document. Avoid changing country or identity details simply to expose a different verification method.Use a valid document.
Check the expiry date, document condition and requested document type. An expired, damaged, temporary or unsupported document may fail.Keep the physical document ready.
A saved image, screenshot, photocopy or scan may fail when the flow requires a live picture of the original document.Clean the camera lens.
A fingerprint on the lens can make text and security features unreadable.Use bright, even light.
Avoid glare, deep shadows and coloured lighting. Do not place the ID under a strong light that reflects off its surface.Remove covers and sleeves.
Plastic sleeves can create glare or hide document edges.Allow camera access.
Check the app or browser permission before beginning a time-limited session.Use a stable connection.
An interrupted upload can look like a document problem even when the images were acceptable.Have address or income evidence available only if requested.
Do not upload extra sensitive files in the hope that more documents will improve approval.
For a broader account decision, the best dollar-account checklist for Nigerian freelancers explains why verification is only one part of choosing a receiving route.
How to complete walllet.com KYC step by step
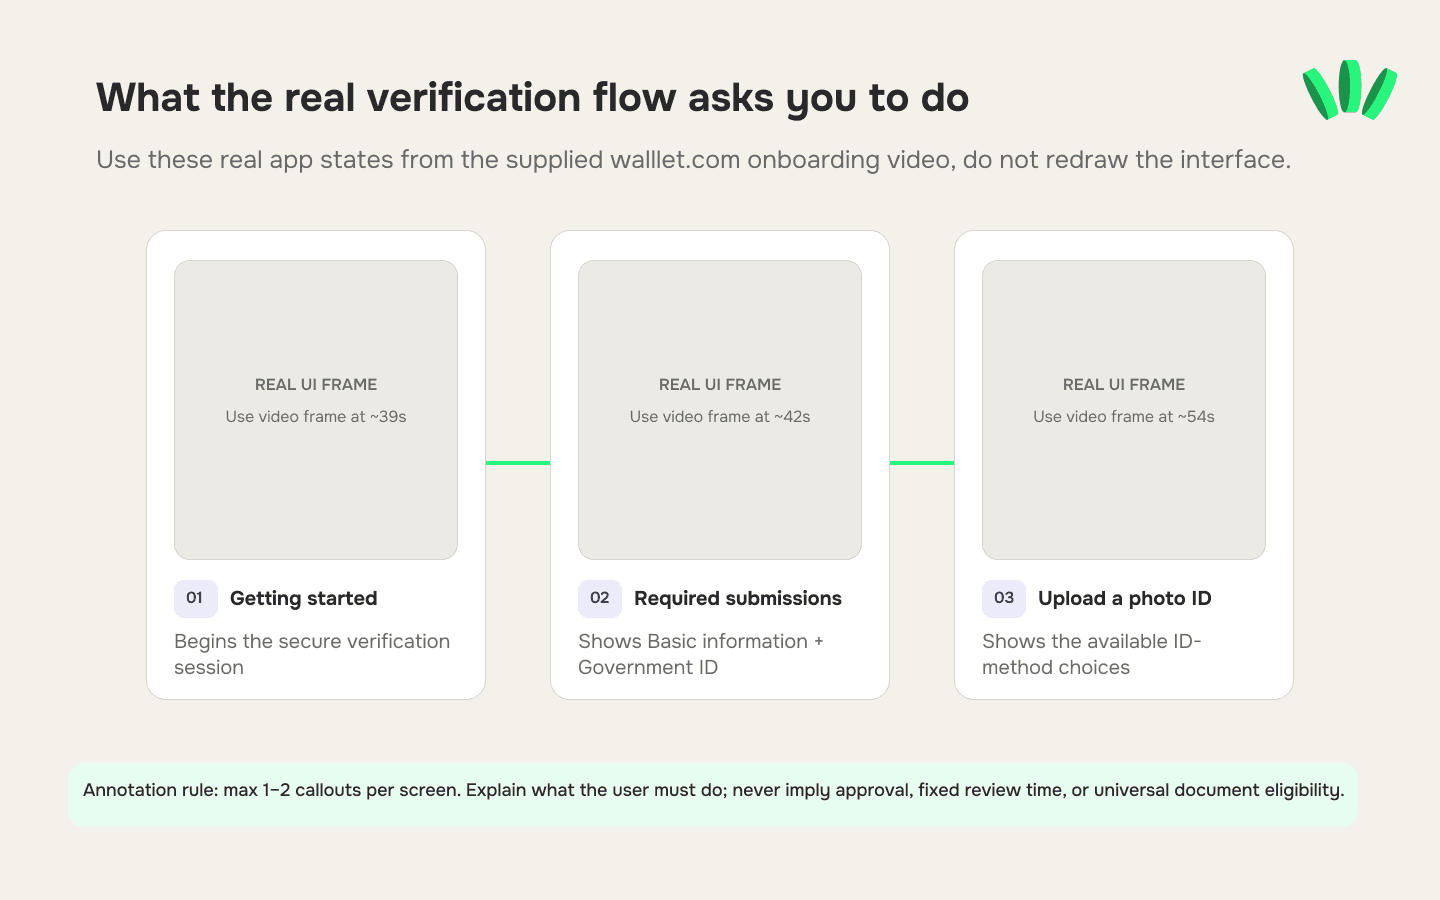
1. Start from an official walllet.com route
Open the official app or verification page from your account. Do not use a verification link forwarded by another person.
Check the app name, domain and context before entering identity information.
2. Select the correct country and service
Choose the country and feature that actually apply to you. Card verification, payment-account verification and another provider’s verification process may request different information.
A country mismatch can affect which document types appear and whether the submitted ID can be evaluated correctly.
3. Enter your details exactly
Use the legal spelling and order shown on your document. Check:
full name;
date of birth;
document number;
country of issue;
address;
phone number or email address.
Do not shorten a name or replace it with a nickname. If your document and account legitimately use different name formats, do not guess which version will pass. Follow the correction path shown in the product or contact official support.
4. Capture the original document as instructed
If the flow opens the camera, treat that as a request for a live capture unless it explicitly offers an upload option.
Place the document on a plain, contrasting surface. Hold the phone directly above it and wait for the camera to focus.
5. Keep every edge visible
Do not zoom so far that a corner leaves the frame. The complete document should be visible, including all four edges and any requested front or back side.
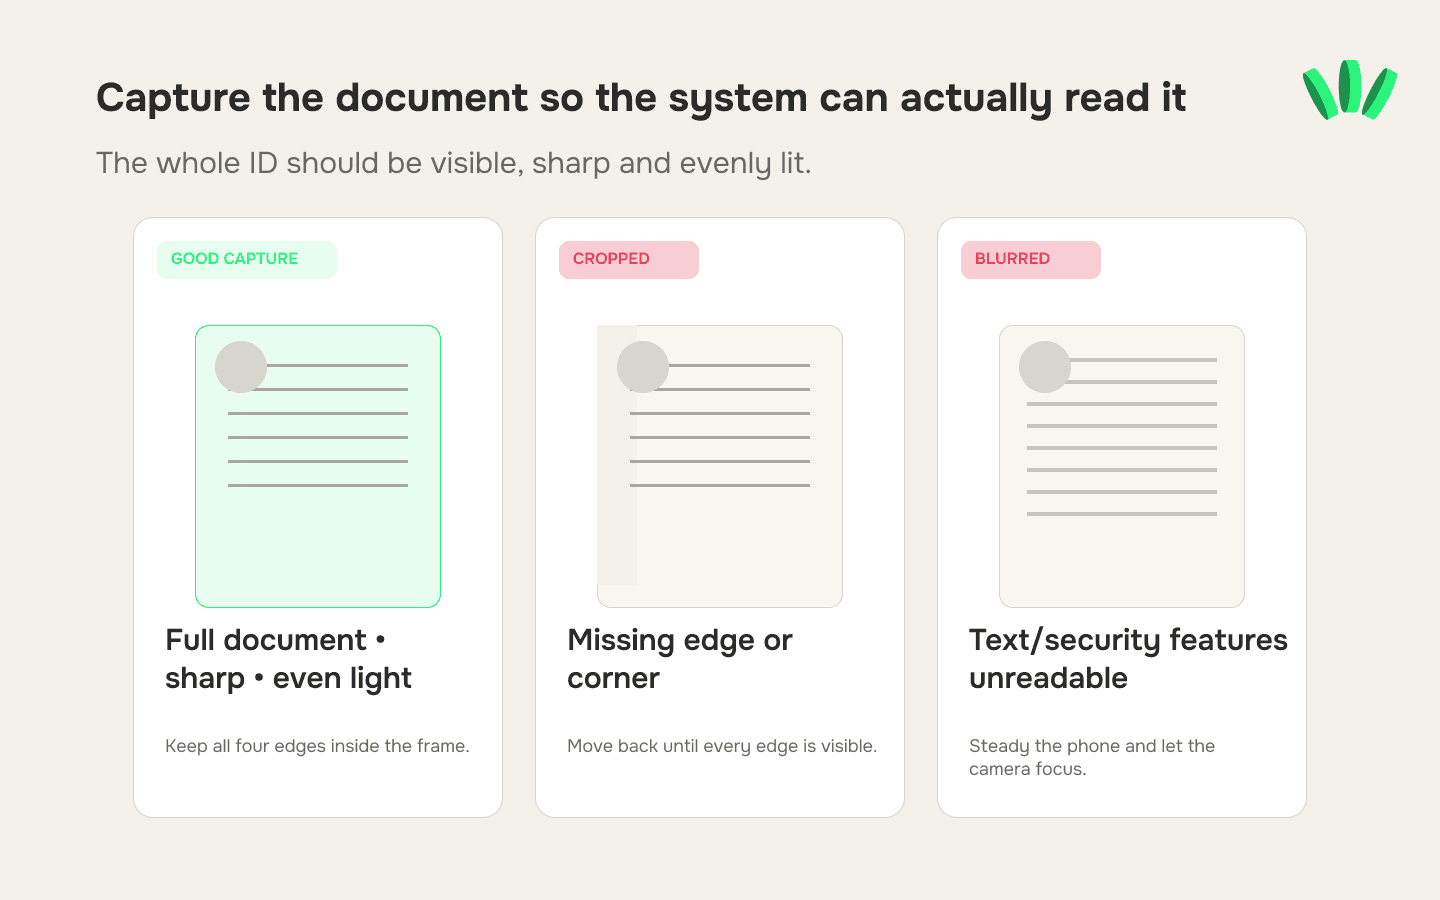
Do not crop, rotate, filter, annotate or compress the image before submission. Identity-verification systems commonly request resubmission when the full document is missing or image quality is poor, as shown in Veriff’s verification decision guidance.
6. Complete the selfie or liveness check
Remove sunglasses, masks or anything hiding your face. Use neutral, even lighting and follow the movement or positioning prompts.
The face must be visible and capable of being compared with the portrait on the identity document. Do not submit another person’s image or a photograph of a screen.
7. Provide address or source-of-funds evidence only when asked
Upload the exact evidence named in the request. Check whether the document must:
show your full legal name;
show the same residential address;
fall within a specified issue-date range;
include every page;
display the issuing organisation;
remain uncropped and readable.
Requirements differ. A bank statement, utility document or other file should not be assumed acceptable unless the current flow lists it.
8. Review before submitting
Check the country, spelling, document type and photo quality one final time. Repeated submissions with the same unresolved error are unlikely to fix the problem.
9. Save the status, not the sensitive document
Record the submission date, status wording and any non-sensitive case or reference number. Do not keep unnecessary copies of your ID in shared folders or messaging apps.
Check which walllet.com receiving and spending features are currently available to your account.

What Does "Under Review" Mean?
Under Review means your verification has been submitted and requires additional checking. This can happen when:
Documents need additional verification
Information needs confirmation
Compliance checks are required
Most users can continue after verification is completed.
Status | Meaning |
|---|---|
Not Started | Verification has not begun |
Submitted | Documents received |
Under Review | Additional checks in progress |
Approved | Verification completed |
Action Required | More information needed |
Why virtual card verification can fail
A failed verification does not always mean the applicant is ineligible. It can also mean that the submitted evidence could not be accepted or evaluated.
The ID is expired or unsupported
An expired ID can fail even when the name and photograph are clear. A paper slip, temporary document or unsupported document type can also be rejected. Renew the document or use another option only if that option is displayed in the current verification flow.
A scan or screenshot was used instead of live capture
A saved scan may be readable to a person but still fail a process designed to inspect a physical document through the camera. Use the original physical document when the flow requests live capture. Use a saved file only when an upload option is explicitly provided.
The document is cropped, blurred or covered by glare
Missing corners, unreadable text, fingers over the document, reflections and motion blur can prevent the system from checking the document properly. Retake the image in bright, indirect light with the entire document visible.
Account details do not match the document
Differences in name, birth date, country, document number or address can trigger an error or additional review. Correct genuine data errors through the official route. Do not change accurate personal information merely to force a match.
The selfie cannot be matched
Poor lighting, an obstructed face, camera blur or failure to follow a liveness prompt can cause the face step to fail. Repeat the capture only when the product offers a retry and follow the displayed instructions closely.
The session or upload failed
Camera permissions, an expired session, an unstable connection or an outdated app can interrupt submission. Before attempting again, confirm that the current attempt was not already received. Opening several sessions can make it harder to identify the active application.
What does “Under Review” mean?
“Under Review” means the submission has not received a final approval or rejection yet.
The information may be waiting for automated processing, manual assessment, an eligibility check or another review required by the relevant provider. The exact reason may not be visible to the user. It does not mean:
verification has been approved;
verification has failed;
the card has been issued;
the account is permanently restricted;
a decision will arrive within a universal time limit.
Review times can differ by service, provider, country, document and case. Check the in-product status and any official request for further information. Do not repeatedly resubmit while the application remains under review unless instructed.
A KYC review is also different from a client payment being held or checked after it was sent. Use the freelance payment review and delay guide when the identity check is complete but a payment is unavailable.
Verification status map
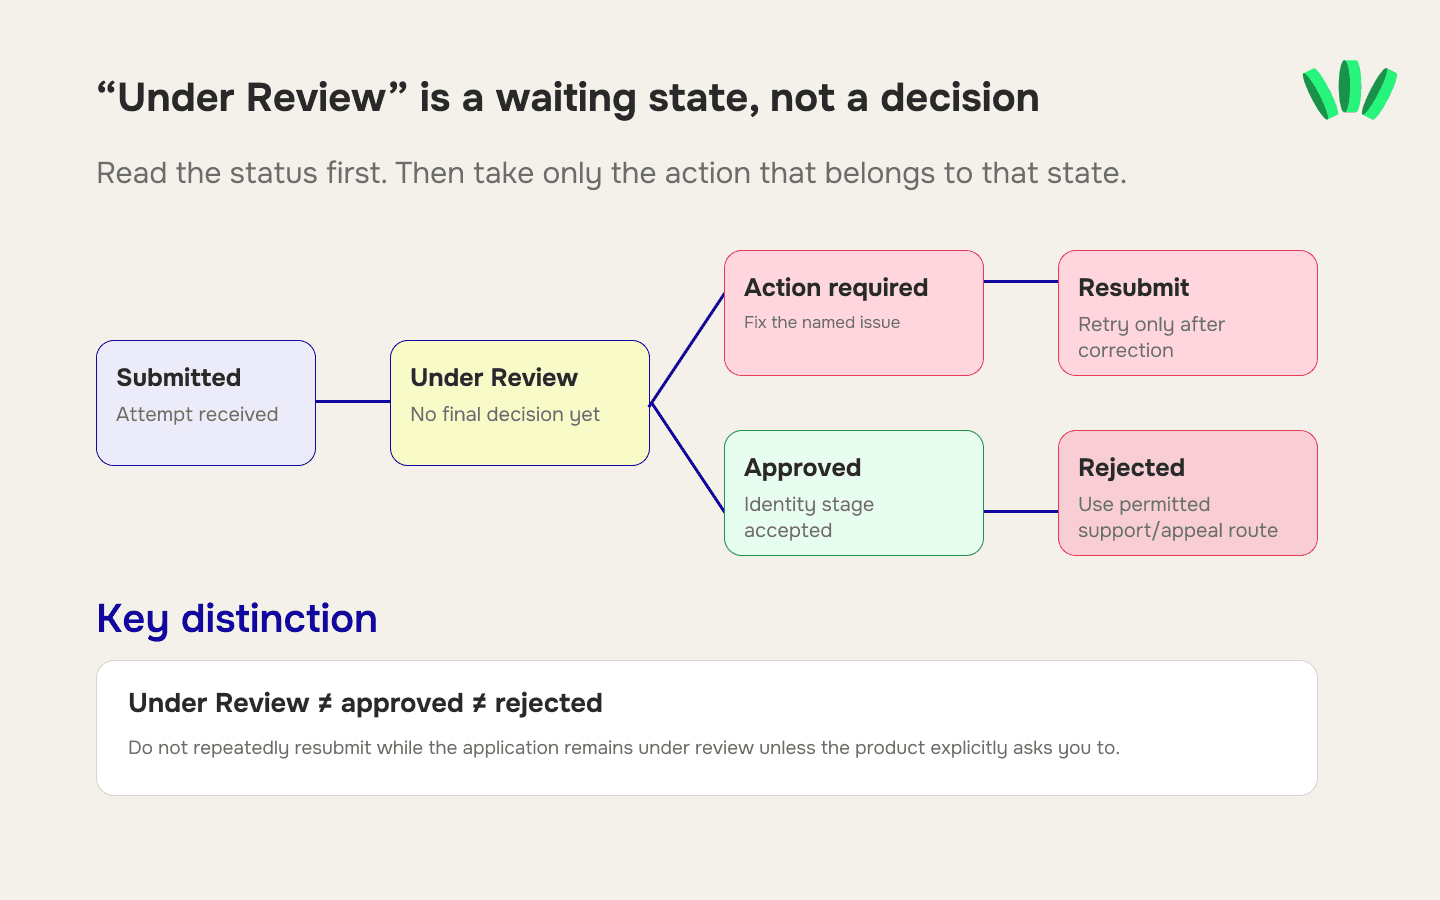
The wording in your account may differ, but these are the practical distinctions.
Status | What it usually means | What to do |
Not started | The required process has not been submitted | Prepare the requested information and start through the official route |
Processing or submitted | The system received the attempt | Keep the session or reference and check for further instructions |
Under Review | No final decision has been issued | Monitor official notices; submit nothing extra unless requested |
Action required | A specific step or document needs attention | Correct the named issue rather than restarting blindly |
Resubmission requested | Another attempt is permitted or required | Fix the stated problem before using the supplied retry |
Approved | The identity stage was accepted | Follow the next in-product step; other eligibility checks may still apply |
Rejected | The attempt or application was not accepted | Read the available reason and use only the permitted appeal, retry or support route |
What to do when resubmission is unavailable
Do not create a second account or send documents through an unofficial channel.
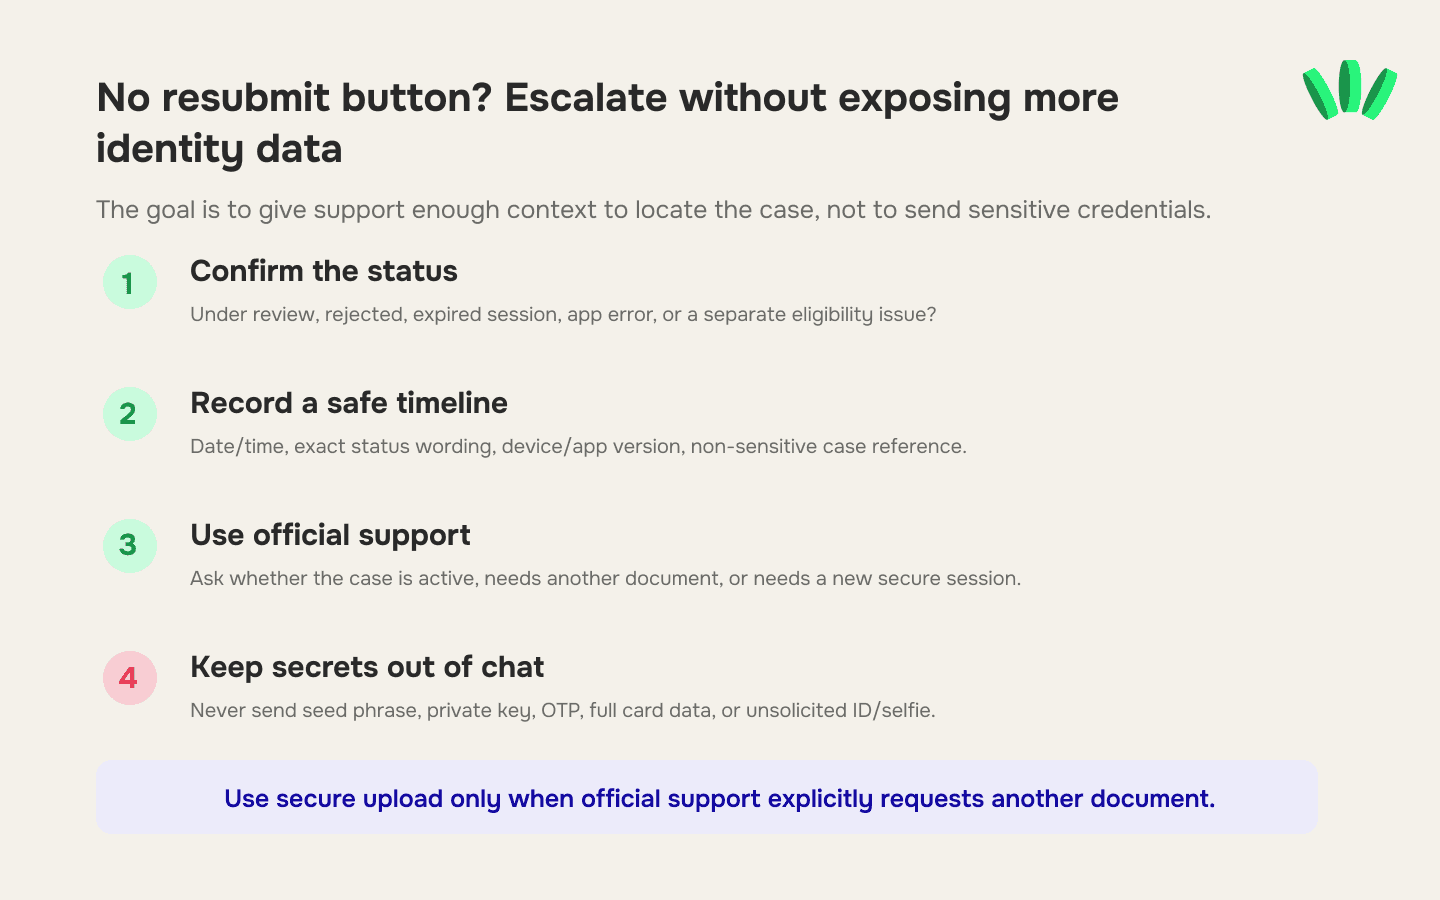
1. Confirm the actual status
Distinguish between:
an application still under review;
a rejected application;
an expired verification session;
an app or camera failure;
an approved identity check followed by a separate card-eligibility issue.
2. Record a safe timeline
Prepare:
the date and approximate time of submission;
your time zone;
the exact status wording;
the step where the problem occurred;
the app version and device type;
a non-sensitive application or case reference;
the error message, with private details hidden.
3. Use official support
Ask support to confirm:
whether the application is still active;
whether another document is required;
whether a new verification session can be issued;
whether manual review is available;
whether the feature is unavailable because of eligibility rather than document quality.
4. Protect your identity information
Never send the following through Telegram, social-media messages or an unknown form:
a seed phrase;
a private key;
a passkey or recovery credential;
a one-time password;
complete card credentials;
an unsolicited full ID image;
an unsolicited selfie holding an ID.
If support requires another document, use the secure upload route provided through the official app, website or authorised verification page.
5. Avoid repeated blind attempts
A new attempt should correct a specific issue. Retaking the same cropped image or re-entering the same mismatched information only reproduces the failure.
After KYC approval
Approval confirms the identity stage associated with that verification process. It does not prove that:
every payment-account rail is available;
a virtual card will be issued;
every merchant will accept the card;
every transaction will be approved;
a client’s transfer will avoid review;
the same verification will cover every future provider or feature.
Before sharing receiving details with a client, confirm the beneficiary name, supported rail, currency and payer type. The guide to receiving payments from US, UK and EU clients explains why these details must match the route.
If identity verification is approved but a card purchase fails later, use the separate virtual dollar card decline checklist. A merchant decline and a KYC rejection are different problems.
